Instructions to create product feed for Shopware 5
Here you will find step-by-step instructions for creating a product catalog / product feed for use with Shopstory for the Shopware 5.x store system.

Step 1
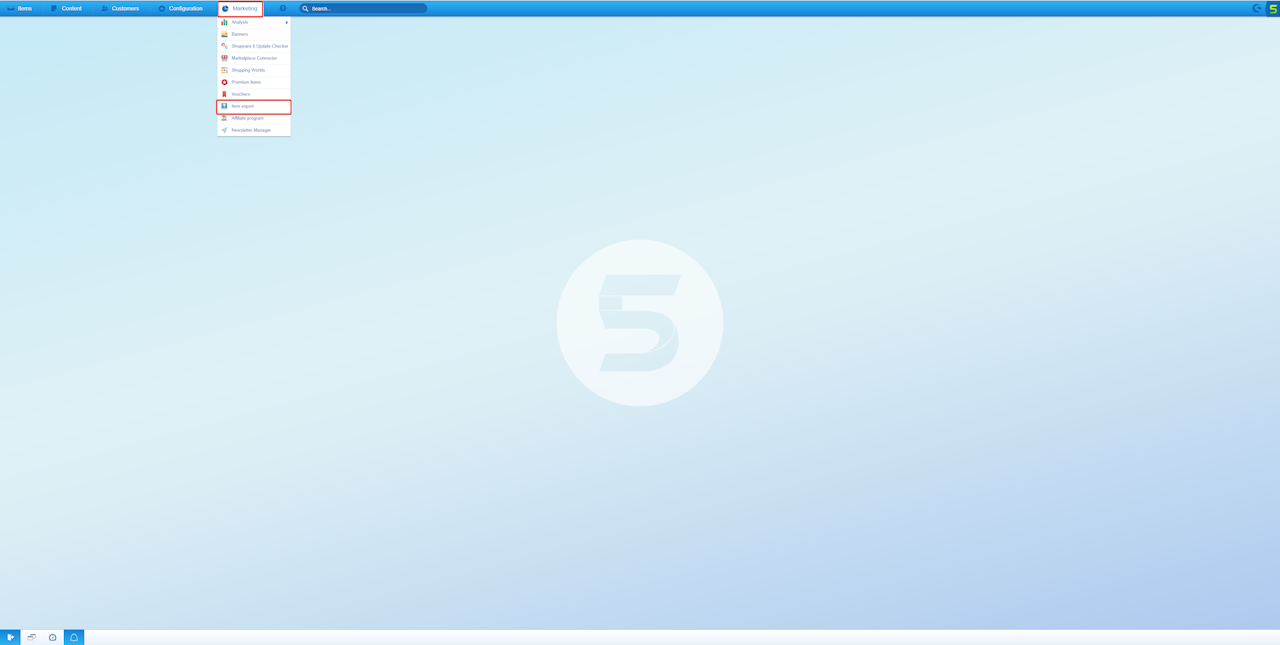
Log in to your store backend and select "Marketing" in the menu and then the "item export" section.

Step 2
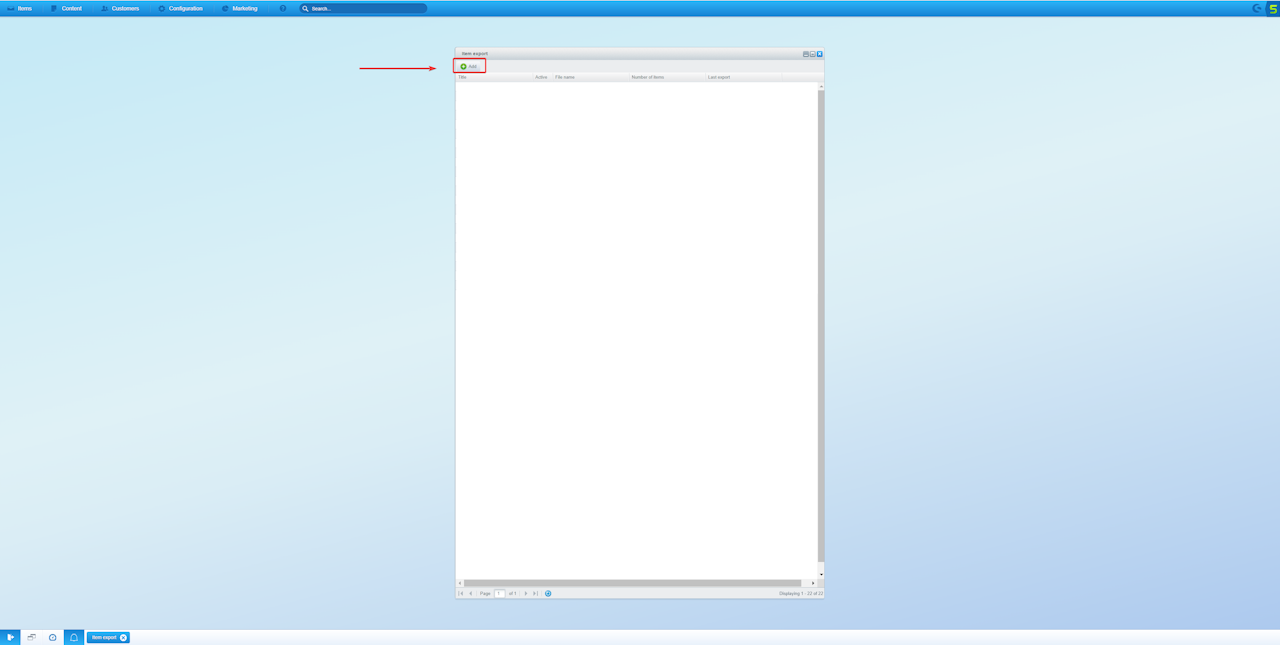
Now click on "Add" in the opened window to initiate the product export.

Step 3
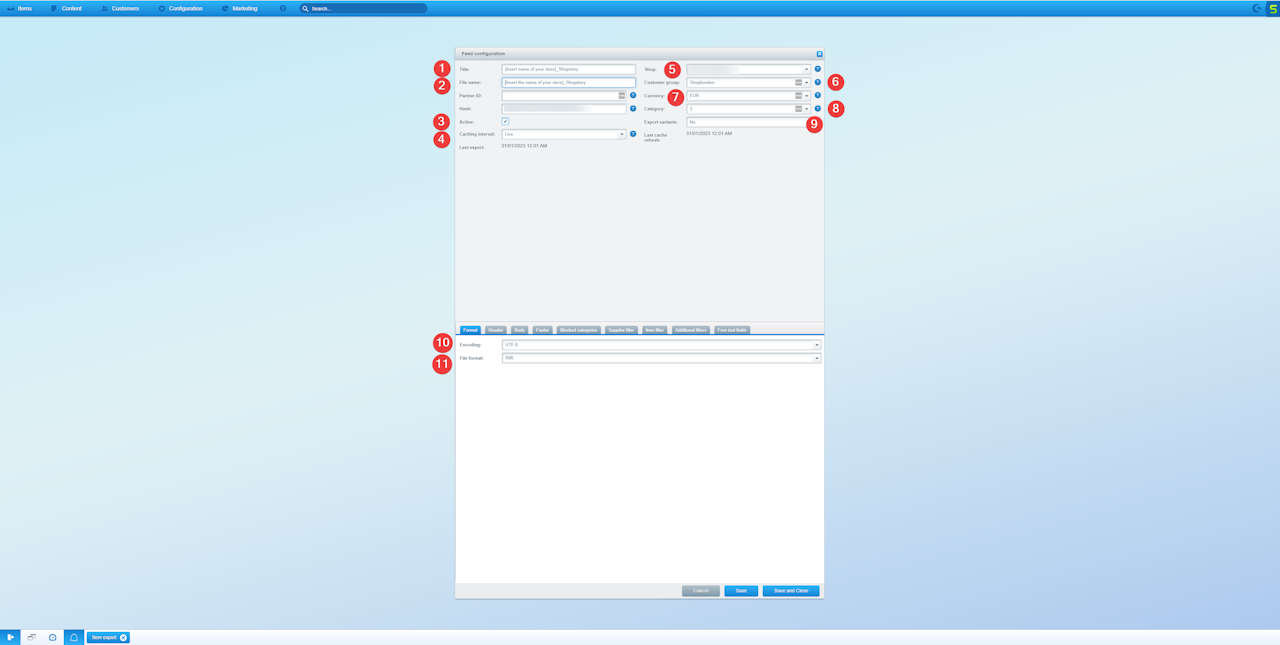
Now you have to select all basic settings (points 1-9). What these are and how these entries will look like depends on your store. You can also export only selected products from your store to shopstory, if you don't want to promote and manage your whole store with Shopstory.
Important points
Point 1 & 2: Name the-
Title: [insert name of your store]_Shopstory
Filename: [insert the name of your store]_Shopstory
To do this, replace the brackets "[Insert your store name]" with your store name so that the feed name is unique.
Point 4: "Live" should be selected to export live data to Shopstory and so that changes in your online store appears quickly in shopstory.
Point 9: It is infrequent that variants are also advertised in Shopstory, because there are several variants on a product page which can be selected by the customer while ordering. In some cases (e.g. when the product variants are very different), advertising variants can make sense.
Points 10 and 11: With UTF-8 and XML you are definitely on the safe side. Even if there are different options that work with Shopstory, we would recommend these settings.

Step 4
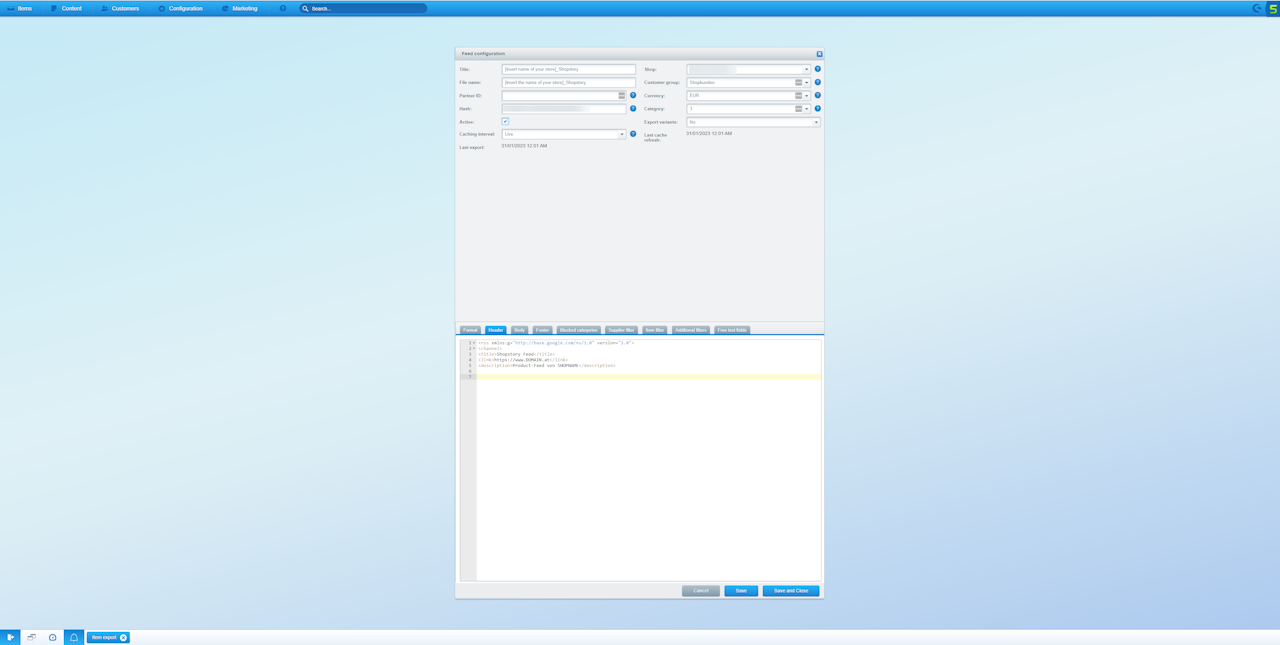
Now switch to the "Header" tab and enter the following code into the template field. Please replace the domain in the <link> with your domain and instead of SHOPNAME enter your own store name.
<rss xmlns:g="http://base.google.com/ns/1.0" version="2.0">
<channel>
<title>Shopstory Feed</title>
<link>https://www.DOMAIN.at</link>
<description>Product-Feed von SHOPNAME</description>

Step 5
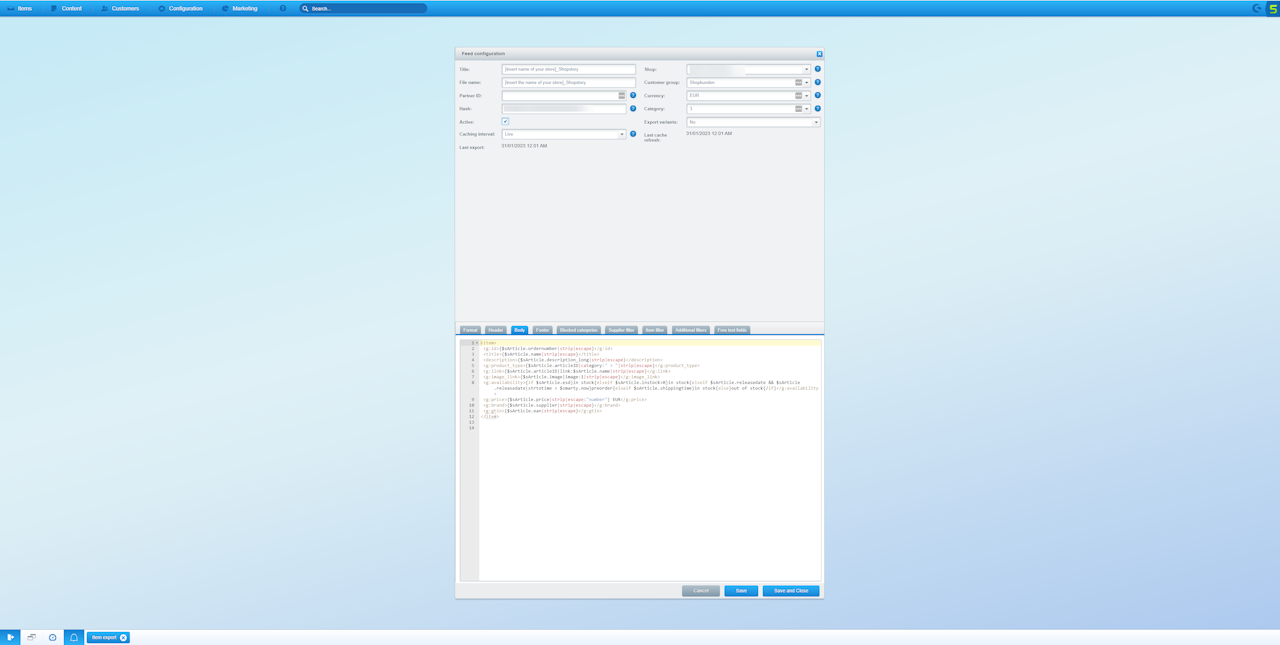
After you have entered your header, switch to the "body" tab and enter the following code:<item> <g:id>{$sArticle.ordernumber|strip|escape}</g:id> <title>{$sArticle.name|strip|escape}</title> <description>{$sArticle.description_long|strip|escape}</description> <g:product_type>{$sArticle.articleID|category:" > "|strip|escape}</g:product_type> <g:link>{$sArticle.articleID|link:$sArticle.name|strip|escape}</g:link> <g:image_link>{$sArticle.image|image:1|strip|escape}</g:image_link> <g:availability>{if $sArticle.esd}in stock{elseif $sArticle.instock>0}in stock{elseif $sArticle.releasedate && $sArticle.releasedate|strtotime > $smarty.now}preorder{else}out of stock{/if}</g:availability> <g:price>{$sArticle.price|strip|escape:"number"} EUR</g:price> <g:brand>{$sArticle.supplier|strip|escape}</g:brand> <g:gtin>{$sArticle.ean|strip|escape}</g:gtin></item>
Information: This code should work for most Shopware stores. However, it may be that your store is built differently and this code needs customization.

Step 6
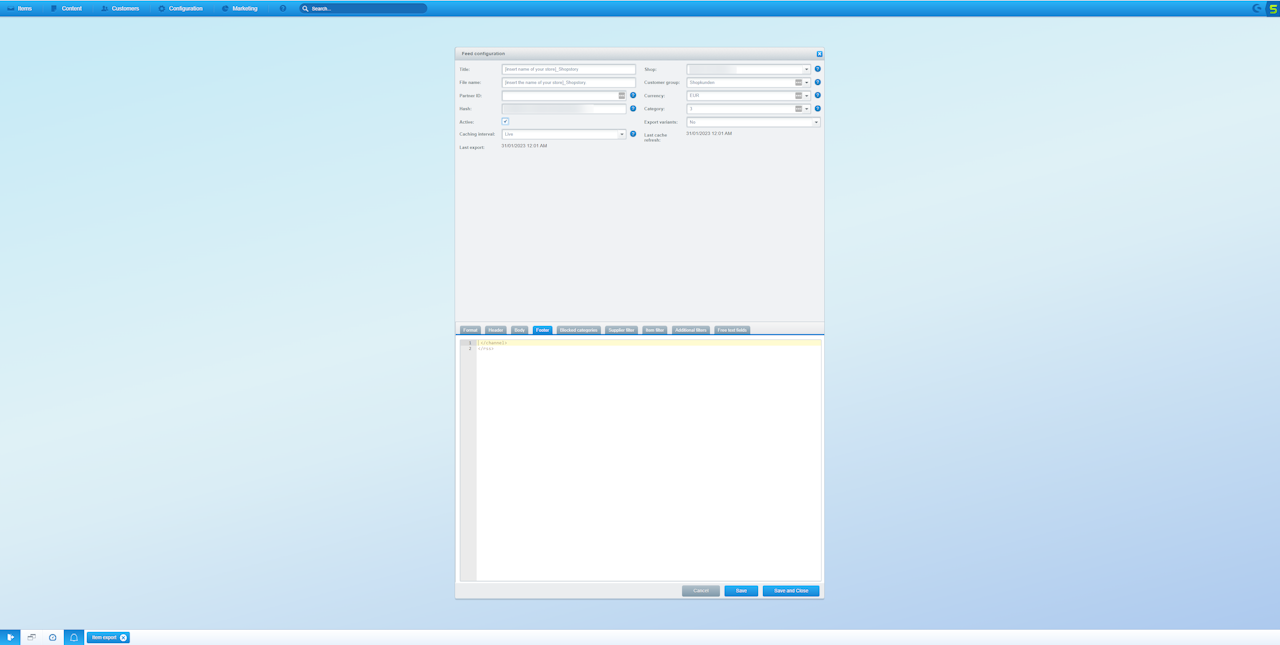
Now switch to the "Footer" tab and enter the following code:
</channel></rss>

Step 7
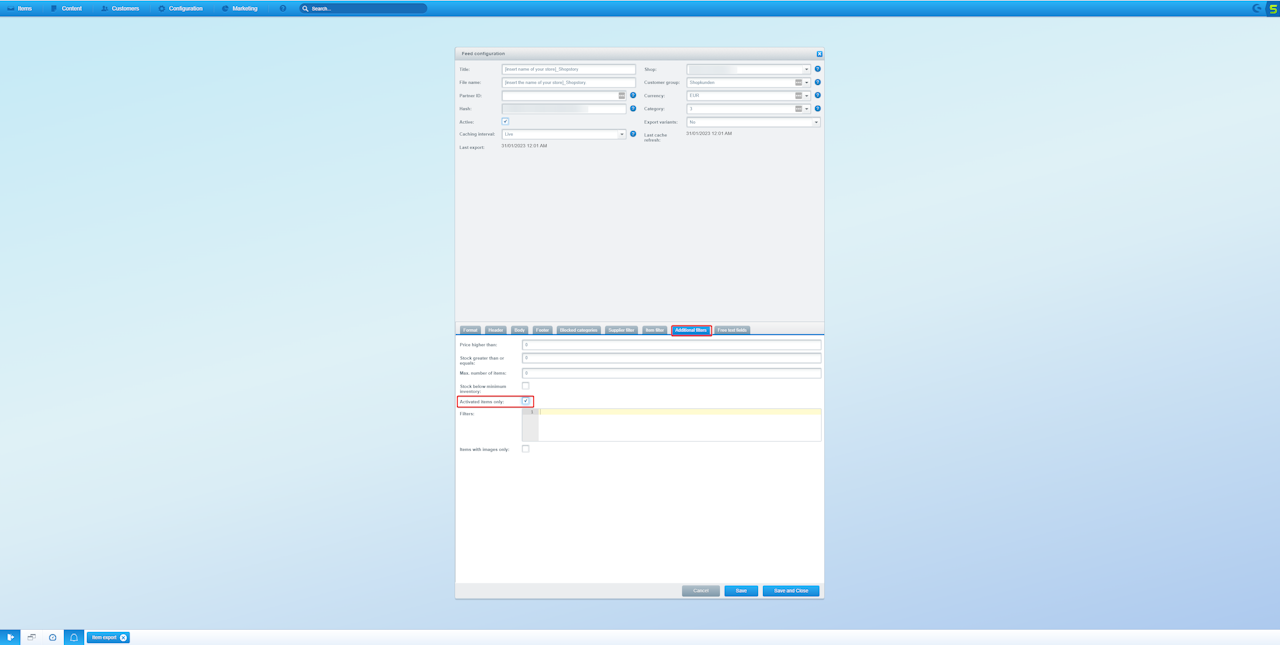
Go to "Additional filters" and check the box to include only active products.
Step 8 (optional)
Now you can look through the rest of the tabs and check if there are any adjustments needed (filters for certain products, etc.). This step is optional and depends on the products you want to transfer to Shopstory.

Step 9
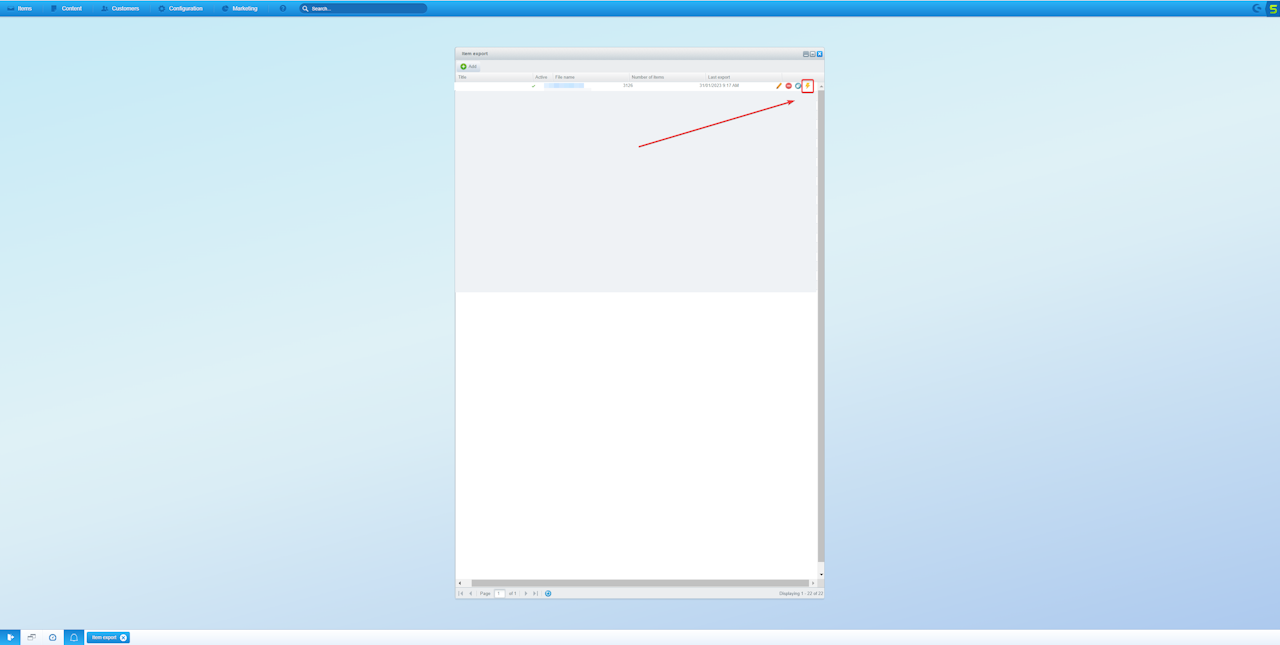
Now everything should be ready! Click on the "Save and close" button at the bottom left. To finally start the export and get the URL for the feed, click now in the list of exports on the lightning bolt, at the just created product export.
Step 10
Now copy the URL of the export and add it to Shopstory as a product feed!
You are done!
