
Step 2: Creating your first ad
It's time to put your skills to the test and create your first ad. But don't worry, If something is unclear. We're in this together, and we are here to guide you through every step of the way. So let's start crafting that ad and watch the customers roll in!
Selecting a Shop Element
Lets start with the first step i.e selecting the shop element. It is good idea to select your your best performing product or category and start advertising it first because if you already have sales here, we can assume that there are even more potential customers who are interested.
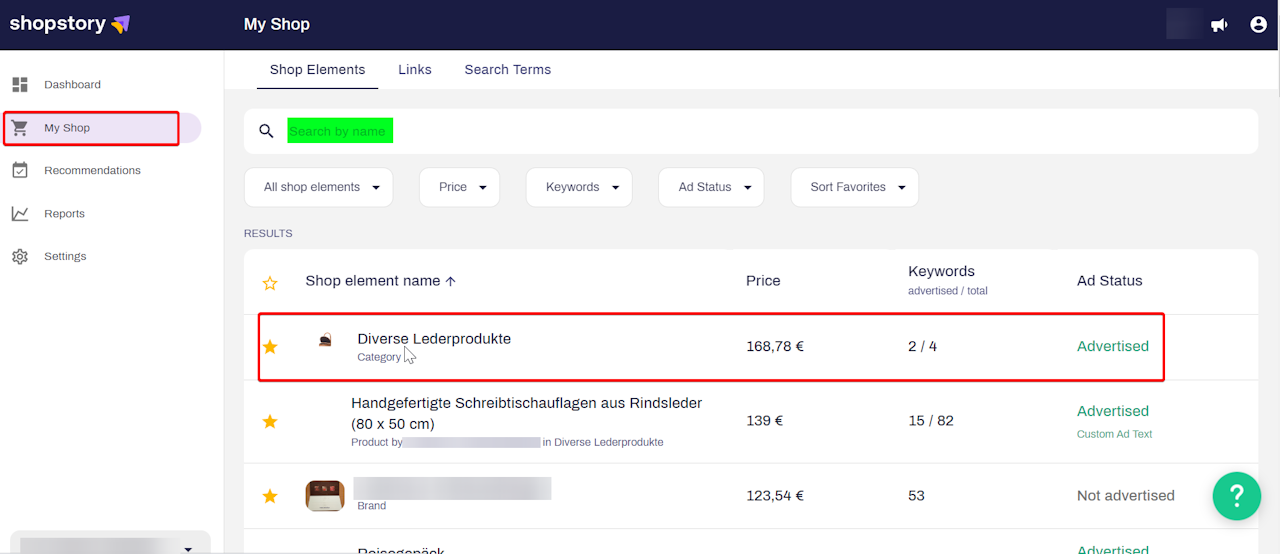
Go to My Shop and Select the shop element for which you want to create ads so that you can advertise it online.

Inserting URLS for shop elements
Checking URLs
If your product feed is stored in Shopstory, all elements from it are displayed under "My Shop". For products, the URL can be automatically assigned based on the information in the product feed. The respective URL is then subsequently used as the target URL for the advertising.
However, Shopstory cannot automatically link the URLs of your categories, brands and categories x brands to their relevant shop elements. So you will need to do this for the elements that you consider to be important!
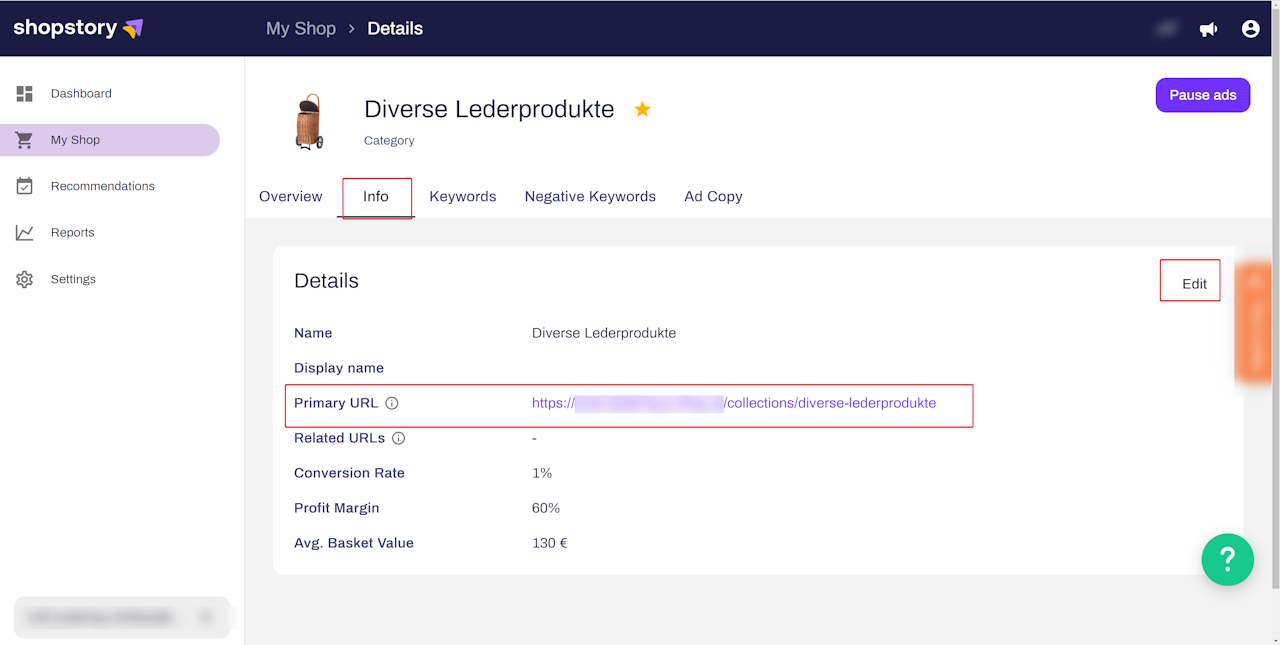
Go to the info tab of the shop element you selected and make sure you already have a URL here. if you do not have it, you can add the URL using the edit button.

Adding keywords
Adding Keywords
Keywords are like pick-up lines for search engines. They're the magic words that get your website noticed and make the search engine algorithms fall head over heels for you. But just like in the dating world, it's all about finding the right ones. You don't want to be too generic or too specific, or you might end up getting ignored or attracting the wrong kind of attention. So, choose your keywords wisely, and who knows? You might just get a match made in search engine heaven!
Lets add some keywords to your account.
(Please use the pink arrow to see the next picture)
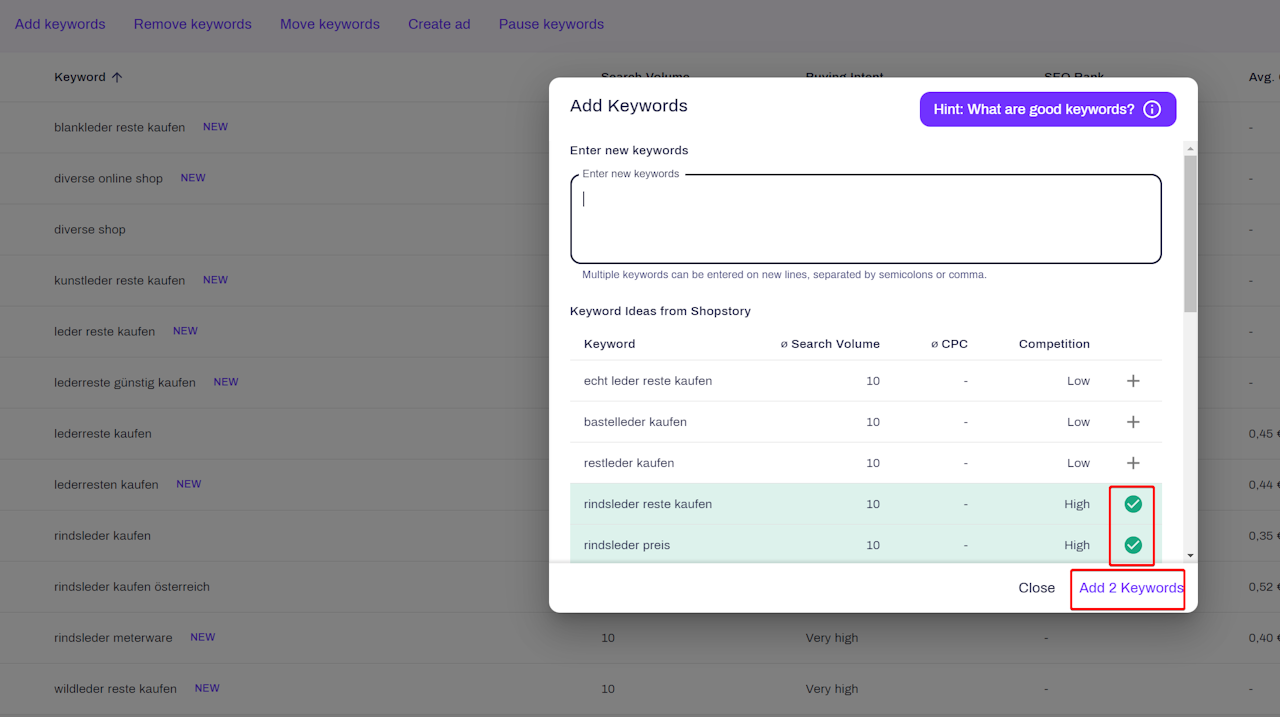
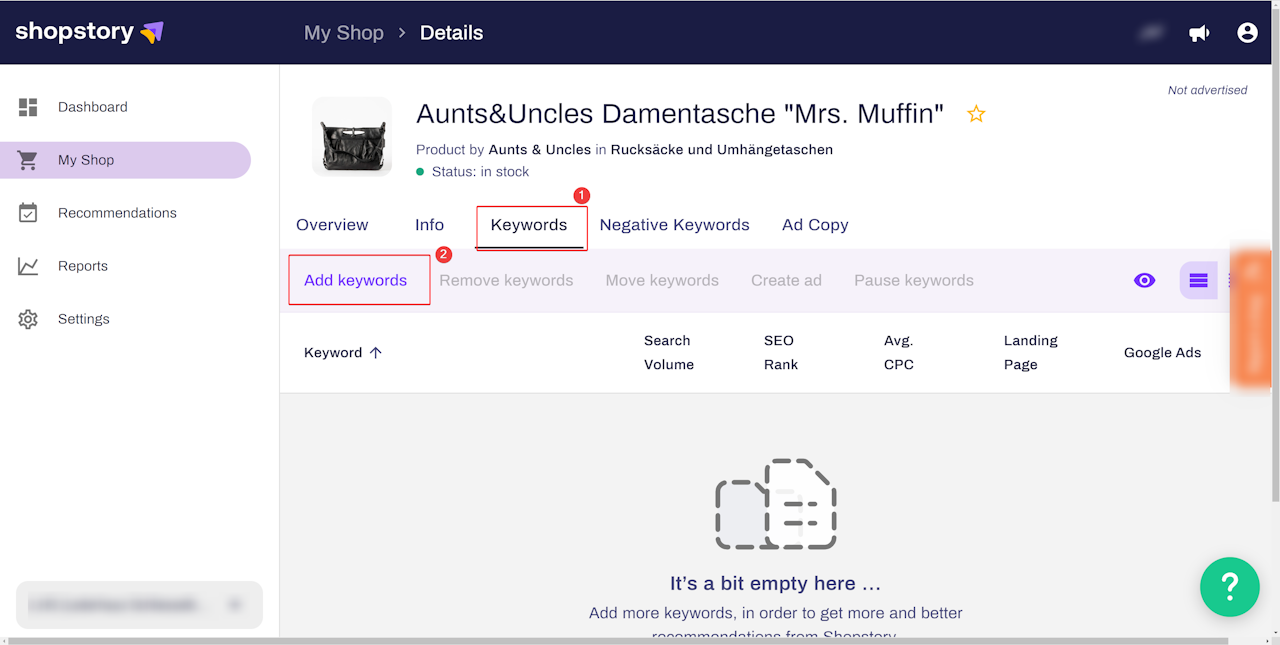
Select the keyword column to check already existing keywords which have been imported automatically from search console. If there are no keywords, click on keywords and then "add keywords" to ad more keywords etc.
A popup window will appear, select the keywords from Keyword Ideas from Shopstory or write your own. Click on add keywords to confirm.
Congratulations! you now have added keywords in your shop element. You can do this for all your shop elements which you want to advertise.

Ad Creation
Ad Creation
(Please use the pink arrow to see the next picture)
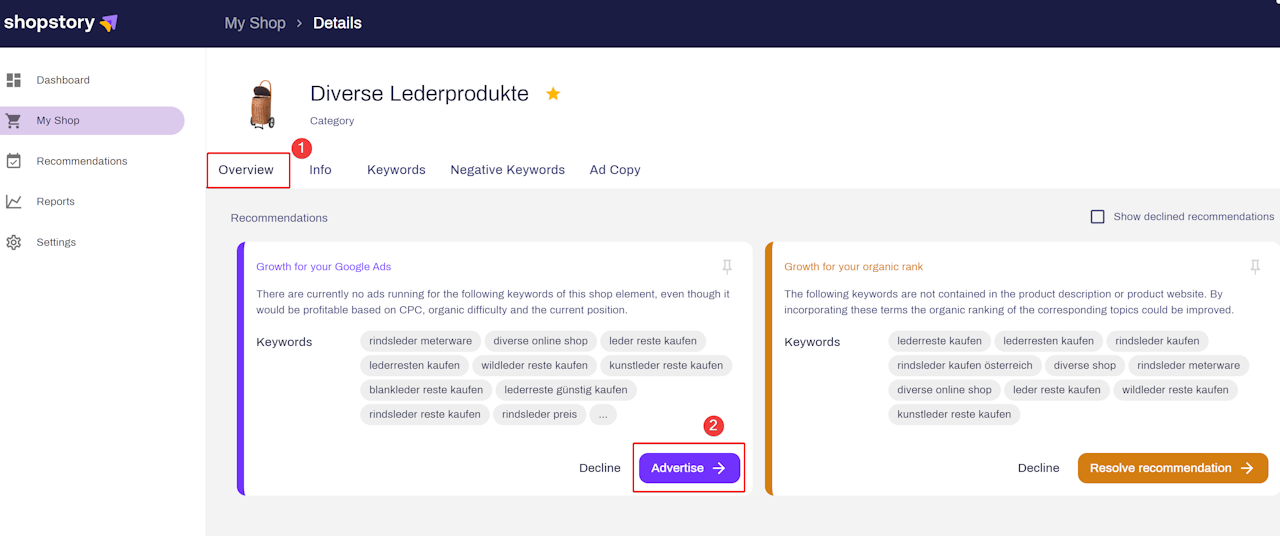
After you have added keywords to your shop element and SEO data is loaded, You will able to see the Recommendation in the overview tab.
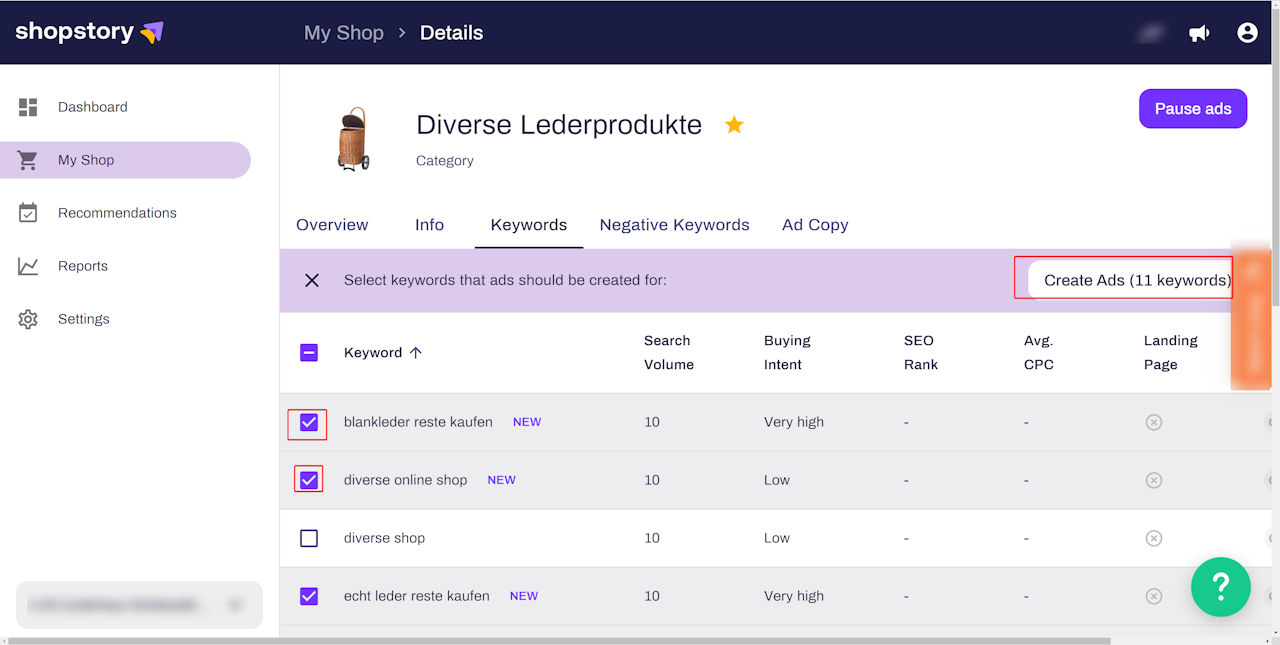
Click on 'Advertise' and It will auto-select all newly added keywords. You can even select more keywords (if you have) and unselect some if you do not want to advertise it.
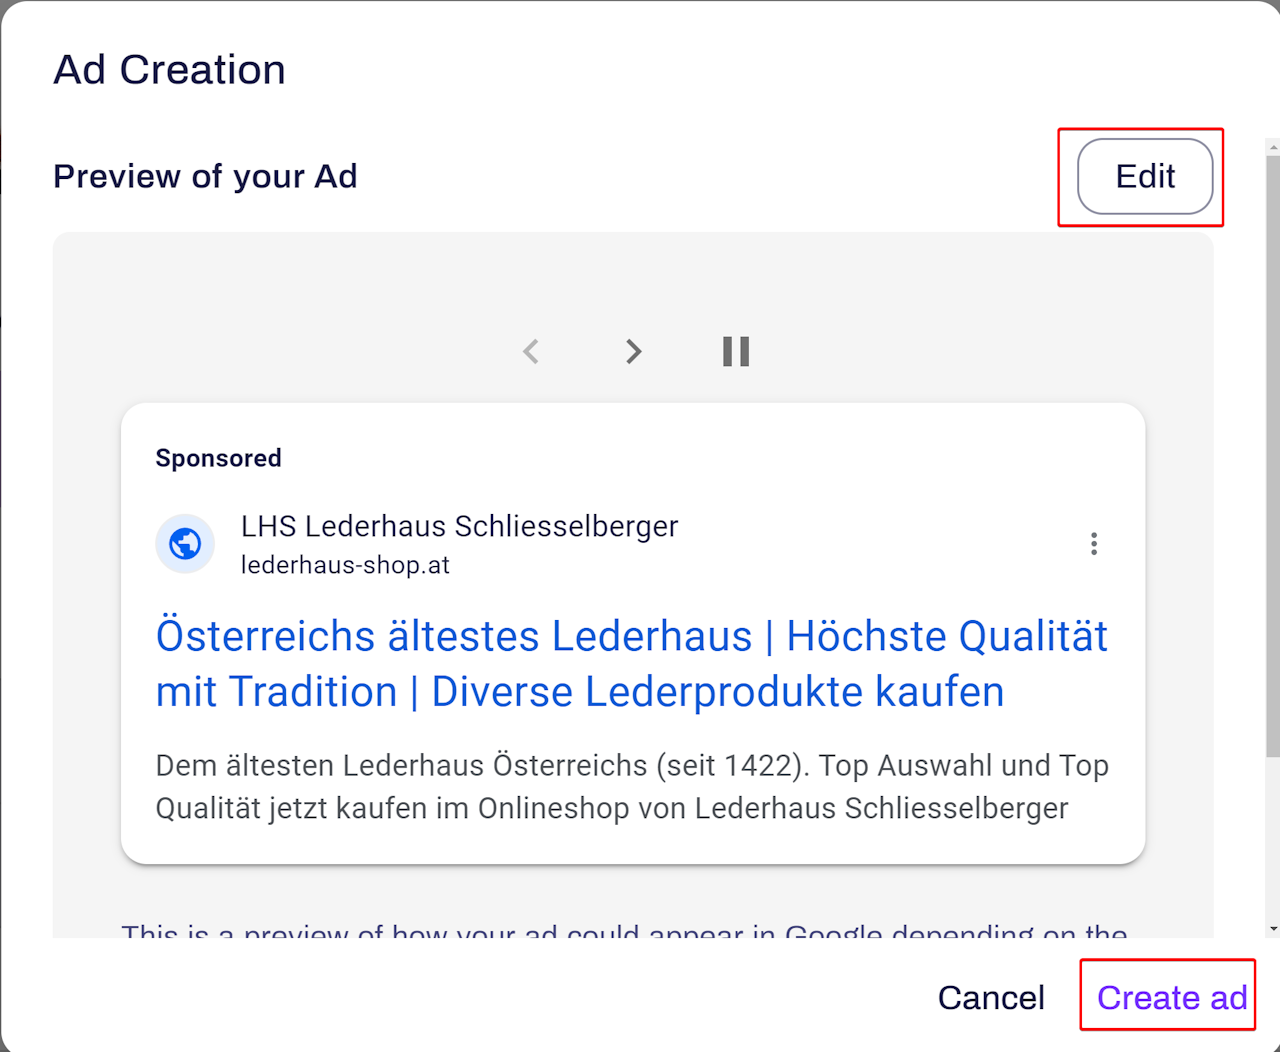
After the keywords selection is done, click on Create Ads to open the dialog box to create the ad. Next, you will see the preview of your ad. you can Edit the ad if you want by clicking on Edit or can click on Create ad button to publish it live.
Congrats, you've successfully set up your first ad!
Now, as Shopstory collects more data about your shop, you will begin receiving recommendations for ads and SEO actions.
Keywords are crucial to your SEA and SEO success!

Pausing Keywords
Lets now have a look at how to pause a keyword:
(Please use the pink arrow to see the next picture)
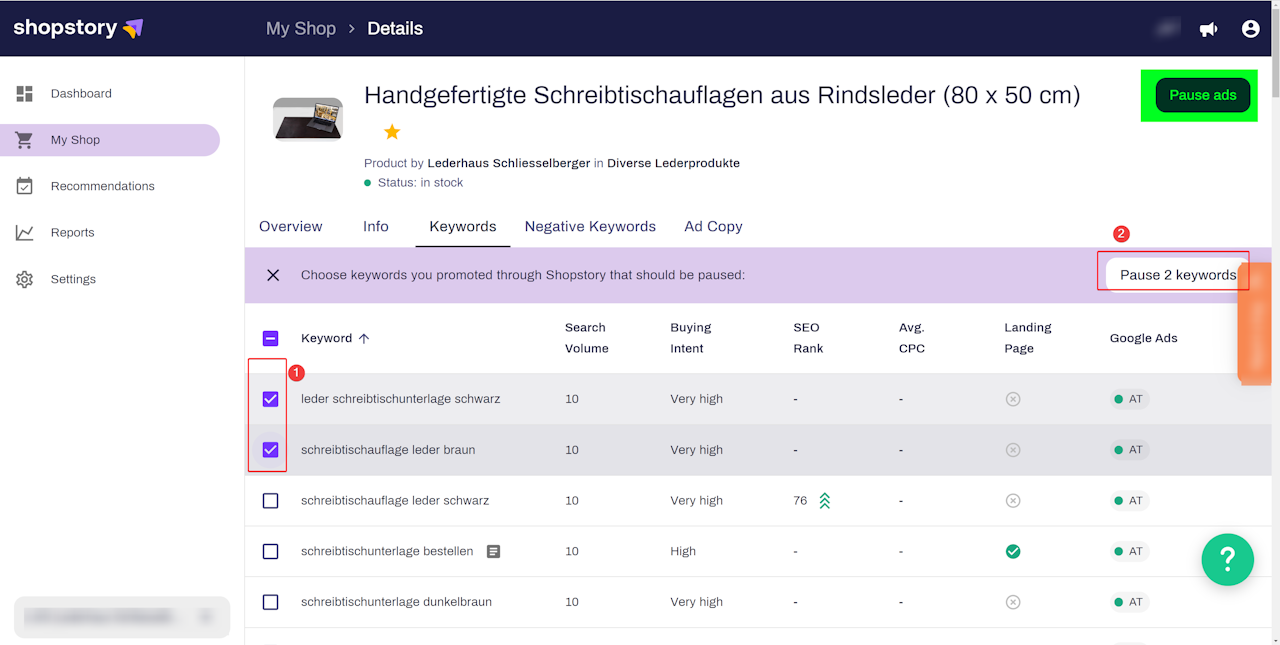
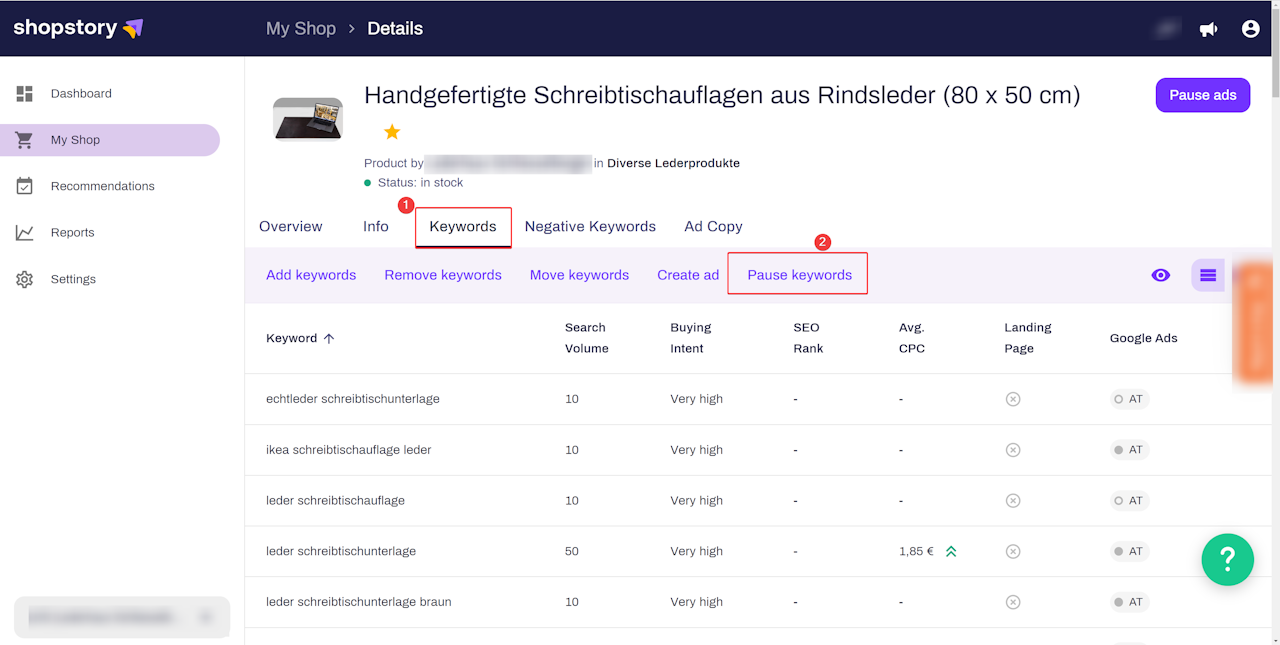
Select the Shop Element for which you want to pause the keywords. Go the Keywords tab, click on Pause keywords.
Select the keywords you want to pause and click on pause keywords.

Removing Keywords
Removing keywords is similar to pausing keywords. Lets have a look at how to do it.
Select the shop element from which you want to remove keywords.
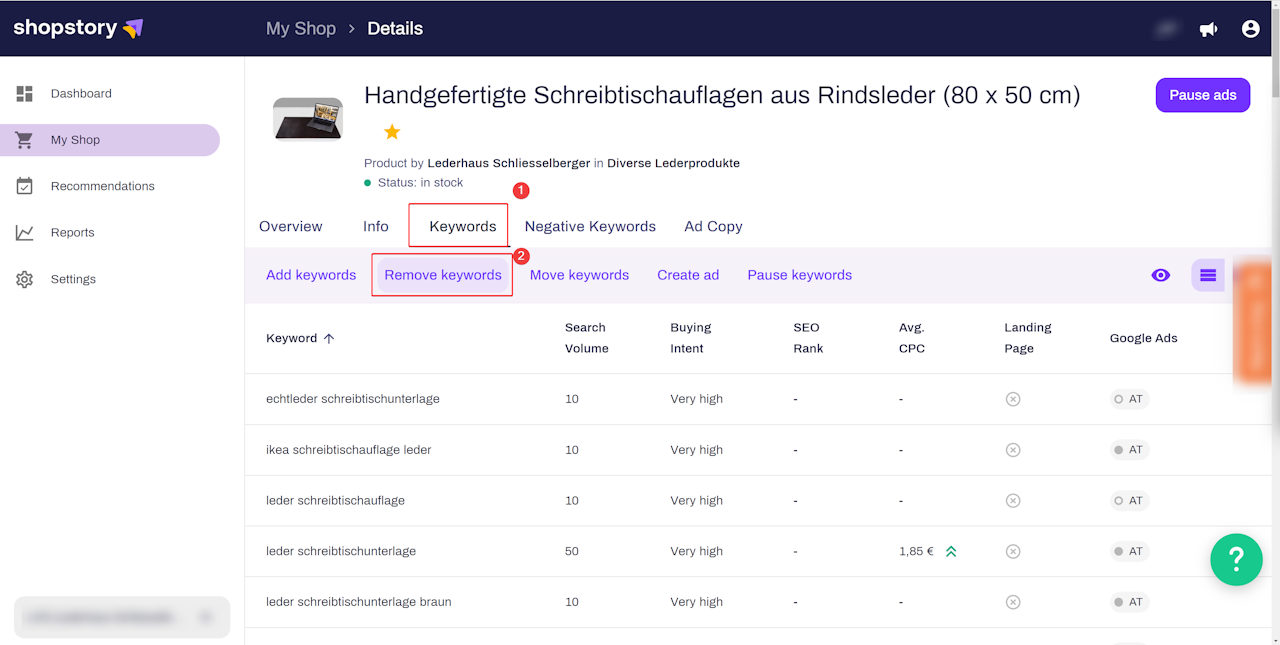
Go to keywords tab an click on remove keywords.
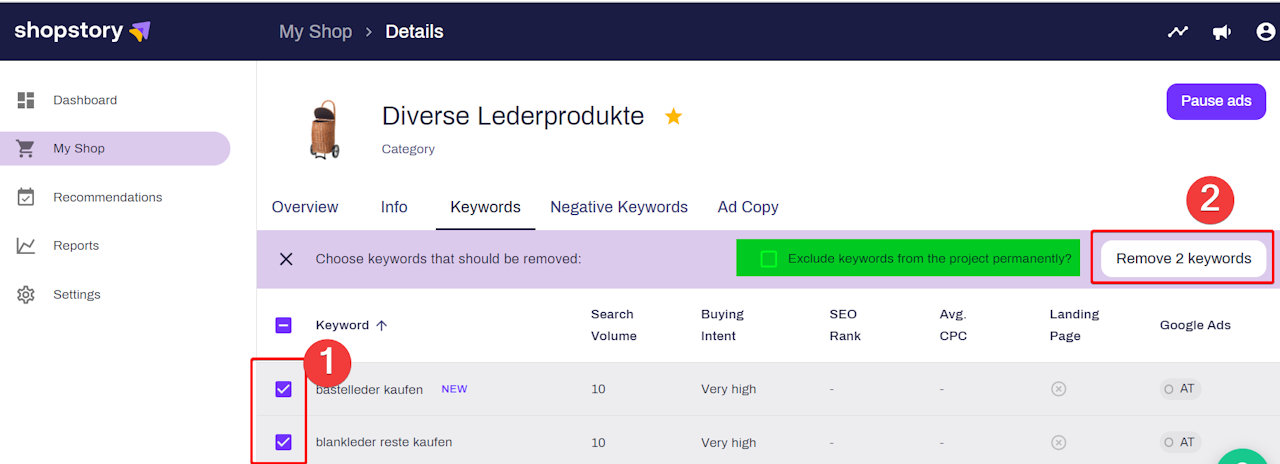
Select the keywords you want to remove and then click on remove keywords to confirm.

